Are you a DIY enthusiast looking to take your metalworking skills to the next level? If so, then you’ve come to the right place. In this article, I’ll be diving into the world of DIY press brake projects. Whether you’re a beginner or an experienced metalworker, a press brake can be a valuable tool in your arsenal. From bending sheet metal to creating precise angles, a press brake opens up a whole new world of possibilities for your projects.
When it comes to DIY press brake projects, the sky’s the limit. With a press brake, you can tackle a wide range of projects, from simple brackets to complex metal sculptures. The best part is that you can build your own press brake right in your own workshop. In this article, I’ll be sharing some tips and tricks for building your own press brake, as well as showcasing some inspiring DIY projects that you can try out.
Ready to get started? Building your own press brake is easier than you might think. With just a few basic tools and materials, you can have your very own press brake up and running in no time. In this article, I’ll be walking you through the step-by-step process of building a DIY press brake, from selecting the right materials to assembling the components. So grab your tools and let’s get started on your next DIY project.
What is a Press Brake?
A press brake is a versatile tool used in metalworking projects to bend and shape sheet metal. It is an essential piece of equipment for DIY enthusiasts and professionals alike. With a press brake, you can achieve precise angles and bends, allowing you to create a wide range of projects, from simple brackets to complex metal sculptures.
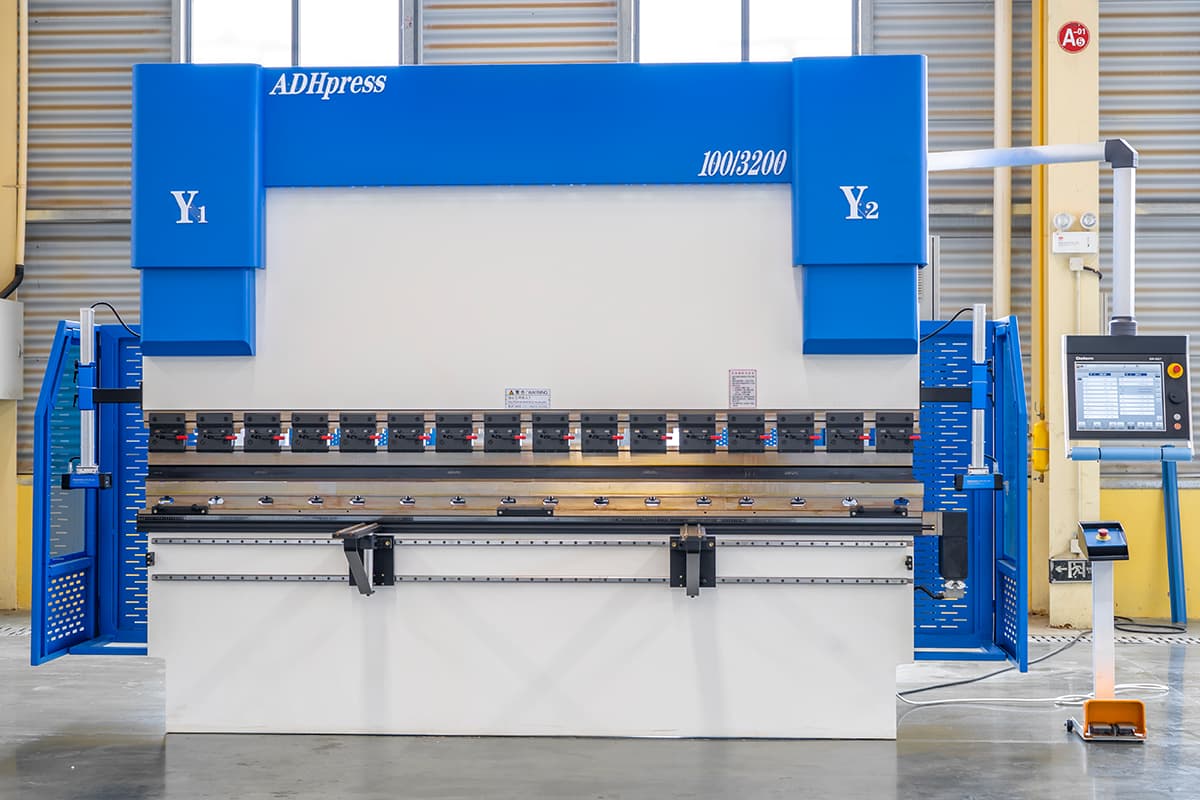
The press brake consists of a sturdy frame, a movable upper beam, and a lower die. The sheet metal is placed between the upper beam and the lower die, and pressure is applied to bend the metal into the desired shape. The angle and length of the bend can be adjusted according to your project requirements.
One of the main advantages of using a press brake is its accuracy and repeatability. Unlike manual bending methods, a press brake ensures consistent results with each bend. This precision is crucial when working on projects that require uniform angles and dimensions.
Press brakes come in various sizes and capacities, allowing you to choose the right one for your specific needs. Smaller press brakes are ideal for hobbyists and DIYers, while larger ones are suitable for industrial-scale projects. Additionally, there are manual, hydraulic, and CNC-controlled press brakes available, offering different levels of control and automation.
Whether you are a seasoned professional or a beginner in metalworking, a press brake is a valuable addition to your workshop. It opens up a world of possibilities for creating unique and customized projects with ease. So, if you’re ready to take your DIY metalworking skills to the next level, consider adding a press brake to your arsenal of tools.
Benefits of DIY Press Brake Projects
There are several benefits to embarking on DIY press brake projects. Whether you’re a seasoned DIY enthusiast or just starting out, building your own press brake can offer a range of advantages. Here are a few key benefits to consider:
- Cost Savings: One of the most significant benefits of DIY press brake projects is the potential for cost savings. Purchasing a pre-built press brake can be expensive, especially if you’re on a tight budget. By building your own press brake, you can save a substantial amount of money while still achieving professional-level results.
- Customization: Building your own press brake enables you to customize it according to your specific needs and preferences. You can adjust the size, strength, and features of the press brake to suit the types of projects you plan to tackle. This level of customization ensures that your press brake is tailored to your unique requirements.
- Learning Experience: DIY press brake projects provide an excellent opportunity to learn new skills and expand your knowledge in metalworking. As you build your press brake, you’ll gain a deeper understanding of the tool’s mechanics and how it operates. This hands-on experience can enhance your overall DIY skills and empower you to take on more ambitious projects in the future.
- Flexibility: Having your own press brake gives you the flexibility to work on projects at your own pace and in the comfort of your own workshop. You won’t have to rely on external resources or wait for the availability of a rented press brake. This level of flexibility allows you to complete projects efficiently and on your own terms.
Remember, building a press brake may seem daunting at first, but with the right guidance and a little patience, it can be a rewarding and enjoyable DIY project. So, grab your tools and get started on your next DIY adventure.
Tools and Materials Needed for DIY Press Brake
Building your own press brake is an exciting project that requires a few essential tools and materials. Here’s what you’ll need to get started:
- Metal Frame: The foundation of your press brake is a sturdy metal frame that can handle the pressure of bending metal. You can use steel square tubing or angle iron to construct the frame.
- Hydraulic Cylinder: A hydraulic cylinder is the heart of any press brake. It provides the force needed to bend the metal. Look for a cylinder with a sufficient tonnage rating for your desired bending capacity.
- Hydraulic Pump: The hydraulic pump powers the cylinder and controls the bending process. You can choose between a hand pump or an electric pump, depending on your preferences and budget.
- Ram and Die Holder: The ram is the moving part that applies pressure to the metal, while the die holder holds the die, which determines the shape of the bend. These components should be made of durable materials like steel or aluminum.
- Bending Die: A bending die is a crucial part of the press brake setup. It determines the angle and radius of the bend. You can purchase pre-made bending dies or fabricate your own based on your specific project needs.
- Measuring Tools: Accurate measurements are essential for precise bending. Invest in a reliable tape measure or caliper to ensure your bends are consistent and accurate.
- Welding Equipment: Assembling the press brake will require welding. Make sure you have a welding machine, welding helmet, gloves, and other safety gear to complete this step.
- Safety Equipment: Working with metal and machinery can be dangerous, so prioritize safety. Wear safety glasses, gloves, and ear protection to protect yourself from potential hazards.
Remember, this is just a basic list of tools and materials needed for a DIY press brake project. Depending on your specific design and requirements, you may need additional items. Now that you have a better understanding of what you’ll need, it’s time to gather your materials and get started on your DIY press brake project.
Step-by-step guide for building a DIY press brake
Building your own press brake may seem like a daunting task, but with the right guidance, it can be a rewarding and achievable project. Here is a step-by-step guide to help you get started:
- Gather your materials: Before you begin, make sure you have all the necessary tools and materials. This includes a sturdy metal frame, a hydraulic cylinder, a hydraulic pump, a ram and die holder, a bending die, measuring tools, welding equipment, and safety gear.
- Design and measure: Start by designing your press brake and determining its dimensions. Measure and mark the locations for the hydraulic cylinder, the ram and die holder, and the bending die. Accuracy is key, so take your time with this step.
- Build the frame: Construct the metal frame using the measurements and design you have determined. Weld the pieces together securely, ensuring the frame is sturdy and stable.
- Install the hydraulic system: Attach the hydraulic cylinder and pump to the frame according to the manufacturer’s instructions. Make sure all connections are tight and secure, and test the system for any leaks or malfunctions.
- Attach the ram and die holder: Mount the ram and die holder onto the frame, ensuring they are aligned properly with the bending die. Use bolts or welding to secure them in place.
- Install the bending die: Place the bending die in the designated location on the ram and die holder. Make sure it is securely fastened and aligned correctly for precise bending.
- Test and adjust: Once your press brake is fully assembled, test it by bending a piece of sheet metal. If necessary, make any adjustments to the alignment or tension to achieve the desired results.
Tips and Tricks for Using a DIY Press Brake
Using a DIY press brake can be a rewarding experience, but it’s important to keep a few tips and tricks in mind to ensure optimal results. Here are some helpful suggestions for using your homemade press brake:
- Safety First – Before operating your press brake, always prioritize safety. Wear appropriate protective gear, such as safety glasses and gloves, to protect yourself from any potential hazards. Make sure the workspace is well-lit and free from any obstructions.
- Start with Practice Pieces – If you’re new to using a press brake, it’s a good idea to start with practice pieces before moving on to more complex projects. This will help you familiarize yourself with the machine and its capabilities, allowing you to gain confidence and precision.
- Choose the Right Material – When working with a press brake, selecting the right material is crucial. Ensure that the material you choose is suitable for bending and can withstand the pressure exerted by the machine. Consider factors such as thickness, hardness, and ductility to determine the best material for your project.
- Measure Twice, Bend Once – Accurate measurements are essential for achieving precise bends. Take the time to measure your material carefully before making any bends. Double-check your measurements to avoid costly mistakes and wasted materials.
- Adjust the Pressure – The pressure exerted by the press brake can significantly impact the quality of your bends. Experiment with different pressure settings to find the optimal level for your specific material and desired bend angle. Keep in mind that too much pressure can cause deformation, while too little may result in incomplete bends.
Remember, practice makes perfect when it comes to using a DIY press brake. Take your time, follow these tips, and don’t be afraid to make adjustments along the way. With patience and experience, you’ll be able to create professional-grade bends with your homemade press brake.
Safety Precautions When Working with a DIY Press Brake
When working with a DIY press brake, it’s essential to prioritize safety to prevent accidents and injuries. Here are some important safety precautions to keep in mind:
- Wear Personal Protective Equipment (PPE): Before you start using your press brake, make sure to wear the necessary PPE. This includes safety glasses, gloves, and ear protection. These items will protect you from any flying debris, sharp edges, or loud noises.
- Ensure Proper Lighting: Adequate lighting is crucial when operating a press brake. Make sure your work area is well-lit, allowing you to see clearly and avoid any potential hazards.
- Secure Your Workpiece: Before bending any material, ensure that it is securely clamped in place. This will prevent it from shifting or moving during the bending process, reducing the risk of accidents.
- Follow Machine Guidelines: Familiarize yourself with the manufacturer’s guidelines and instructions for operating the press brake. These guidelines will provide valuable information on how to safely use the machine and avoid any potential hazards.
- Keep Hands Clear: Never place your hands or fingers near the bending point of the press brake. Always use tools, such as a push stick or pliers, to handle the material and keep your hands at a safe distance.
- Use Proper Technique: When operating a press brake, always use the appropriate technique. This includes maintaining a stable stance, using controlled movements, and applying even pressure to avoid any sudden shifts or accidents.
- Regular Maintenance: Regularly inspect and maintain your press brake to ensure it is in proper working condition. Check for any loose or damaged components, and promptly repair or replace them as needed.
Remember, safety should always be your top priority when working with any DIY project, including a press brake. By following these precautions, you can minimize the risk of accidents and enjoy a safe and successful DIY press brake experience.
Examples of Successful DIY Press Brake Projects
Over the years, there have been countless successful DIY press brake projects that have proven the feasibility and effectiveness of building your own press brake. These projects have demonstrated that with the right tools, materials, and guidance, you can achieve professional-grade bends without breaking the bank. Here are a few examples of successful DIY press brake projects to inspire and motivate you:
- The Garage Fabricator’s Dream: One DIY enthusiast transformed his modest garage into a fully functional metal fabrication workshop by building his own press brake. With a sturdy frame, a hydraulic system, and a carefully crafted bending die, he was able to tackle a wide range of projects, from simple brackets to complex sheet metal components.
- The Budget-Friendly Builder: Another DIYer on a tight budget set out to create a press brake using mostly salvaged materials. Armed with determination and resourcefulness, he repurposed an old car jack as the hydraulic system and used scrap steel for the frame. Despite the limited resources, he achieved precise bends and saved a significant amount of money in the process.
- The Innovator’s Custom Creation: One DIYer took the concept of a press brake to the next level by designing and building a custom press brake that perfectly suited his unique needs. By incorporating adjustable features and additional attachments, he was able to effortlessly bend various materials, including aluminum, stainless steel, and even thick gauge steel.
These examples showcase the versatility and adaptability of DIY press brake projects. Whether you’re working with a small budget, limited resources, or have specific requirements, building your own press brake allows you to tailor it to your exact needs. With a little creativity and ingenuity, you can achieve professional results and expand your capabilities as a DIY fabricator.
Conclusion
Building your own press brake may seem daunting, but this article has shown that it is actually a straightforward project that can be accomplished with basic tools and materials. By following the step-by-step guide provided, DIY enthusiasts can create a press brake that is capable of achieving professional-grade bends.
Throughout the article, important tips and tricks were highlighted to ensure success with a DIY press brake. These include prioritizing safety, starting with practice pieces, choosing the right material, measuring accurately, and adjusting the pressure. By taking these factors into consideration, DIYers can achieve precise and accurate bends with their homemade press brake.
It is crucial to remember that safety should always be a top priority when working with a DIY press brake. Wearing personal protective equipment, ensuring proper lighting, securing the workpiece, following machine guidelines, keeping hands clear, using proper technique, and performing regular maintenance are all essential steps to prevent accidents and injuries.
The versatility and adaptability of DIY press brake projects were also showcased, providing inspiration for readers to explore their creativity and tackle a wide range of bending tasks.
So, why wait? With the knowledge and guidance provided in this article, you can confidently embark on your own DIY press brake project and enjoy the satisfaction of creating precise bends with your homemade tool.